Showing posts with label Sound. Show all posts

Saturday, 17 August 2024

Seven Years

This blog is now more than 7 years old. The case is complete.  It’s time to look where we stand and have a bit of retrospective.


It’s been three years now since I bought the Tiptop Mantis case to host my modular synthesizer.  A fine decision.  It is a nice case with a good power supply with plenty of room.

Here is the current situation with what’s what.


This post is the 54th. The blog has now close to 78000 views. 
 
Along those years, Bob was always there to help me with the Do-It-Yourself aspects. Thanks Bob.


Some highlights of the last years :

- Beads, a granular texture synthesizer, Emilie’s Last stand : April 2021


- Tiptop Mantis, a better case for the synth : October 2021


- Ornament + Crime, the multi-purpose module : January 2022


- Beatstep Pro, the versatile sequencer : April 2024


You’ll find other highlights of this journey in the blog's 3 years retrospective.

The soundcloud playlist was growing as well. Mostly as illustrations of the function of a module for the blog, but not only :
- 14 sound examples of the module at hand;
- 12 sound illustrations of the state of the synthesizer;
- 2 participations to the monthly KVR Music Cafe;
- 1 participation to Audiofanzine Inspired Composition (Compos Inspirées).


Friday, 9 August 2024

My Own Input Module

To close the 4HP gap at the bottom left of my synth case, I added a last input module. It will allow me to enter some external signals and bring them to the voltage level of the modular synth.  Moreover, it has its own piezo microphone.

It is modelled along the lines of Music Thing Modular Mikrophonie and Mutable Instruments Ears.


Input module

One input, an amplifier and an envelope follower for good measure.

The design is based on the original schematic for Ears from Emilie Gillet.  I kept the input gain stage. Due to space constraints, I had to simplify the envelope follower. I’m still doing pass through breadboard here, so this is not dense enough to have the same features as a full fledged Ears (or Microphonie Mk2 for that matters).

It took me a while to figure out the details. I had one operational amplifier available. The other being used by the gain stage. I was going for a short attack but not so short release with the right amount of filtering. Still not perfect : the shape is good enough but I fear that without the proper buffer at the end, I may not be able to drive any type of circuit.


Breadboarding the circuit : envelope follower output on top.


Piezo attached, other for scale

As I wanted to have some bumps to be able to scratch the surface above the piezo, I went with a different technique for the front panel.  It is the technique I used for the previous 2HP modules I made : dremel some lines and blacken them.
 

Bob helps with the panel


Mistakes I made include cabling the potentiometer in reverse (was expected), having a diode badly placed (more problematic) and connecting the piezo to the output instead of the input (confusing left and right duh !).

Debugging
Finished PBAs


This is the densest design I made this way. I begin to feel the limit and a desire to do things differently. I will change the technique for the next designs. In fact I might revisit the first modules I made, shrinking them in the process.
 

On the side


Here it is. Bottom left.


The completed case


And here are some sound examples where the module microphone is used for sound effects. Electric bass and synth pads are treated by the synth through the jack input.


Finally, should you be interested, the schematics and layout.


Saturday, 13 April 2024

A new sequencer

I haven't mentioned it on this blog yet: I bought a second-hand Beatstep Pro from Arturia.

Beatstep Pro


Beatstep Pro is a triple sequencer: two melody sequencers and a dedicated drum sequencer.
It has MIDI and USB inputs and outputs, but above all CV/gate/modulation and trigger outputs, which are useful for driving a modular synthesiser.
My now-ancient Korg SQ-1 pales in comparison. The Beatstep Pro can be used as the master sequencer in my setup.

This machine is cool, very playable and goes perfectly with a modular synth. Not much else to say about it.

Synth setup

Here's an illustration of a song in which the 4 tracks are controlled by the Beatstep Pro and generated (in part) by the synthesiser in a single take.


Drums and percussions : Korg Volca Sample (808 samples) MIDI-driven by the Beatstep Pro and two synth-generated percussions (Pony VCO+noise -> Multimode filter -> Percall). One of the sound is treated with Beads.
Bass : Doepfer VCO (PWM) -> Ripples 12db/oct How Pass Filter -> VCA (enveloppe from Rampage) -> Twin Drive
Melodies : Rings (polyphonic mode -> Left output in a reverb / Right output in a delay.  In polyphonic mode, when both Rings outputs are used, one trigger triggers one output, next trigger triggers the other one. Two melodies in one.
FX unit : Line 6 HX Stomp
DAW : Reaper with EQ and compressors added


Saturday, 4 March 2023

Pony VCO

Befaco Pony VCO
I decided to replace my two Mammouth Boutique modules with two new Befaco kits.
The wooden front panels are very cool, but they contrast a bit with the rest.  Besides, if the modules are okay, I wanted something else.

After much hesitation, I decided to replace the oscillator with the new Pony VCO from Befaco. The other alternatives were two completely different modules: Make Noise STO and Klavis Twin Waves. One for its clean sound and simplicity, the other for its possibilities. In the end, the Pony VCO was chosen for its size (only 4 HP) vs its possibilities. And it's a kit ... well ... kinda.

Pony VCO is a very complete oscillator. It can generate over 7 octaves a sine, a triangle, a sawtooth or a square. It can also be used as a low frequency oscillator if need be.
There is a Thru-Zero FM input, which means that when the modulation signal falls below zero, it continues to oscillate, reversing its phase. This technique should make for some nice metallic sounds. It has a timbre control in the form of a wavefolder for more sonic possibilities. Small but powerful.


The kit
The kit is quite simple: two switches have to be mounted and adjusted with the front panel.  You assemble the front panel.  And that's basically it. The rest are surface mounted components already mounted.

Given the narrowness, the ten or so soldering operations needed require some dexterity and attention.


Bob calibrates

Then comes the calibration. The kit includes a small card with a QR code leading to the manual. Great idea. Except that the manual is incomplete and does not contain the necessary illustration to know where to measure the reference voltage. Fortunately, the complete manual is available on the product page.

The calibration does not pose any particular problem.


In the rack


With the two Music Thing Modular modules, the bottom row is starting to take its final shape.
Note that I took advantage of my purchase at Befaco to order a synth Duster, a handy anti-static duster and bananuts, those coloured minijack nuts to change the look of my Befaco modules and my Erica Synth filter. Befaco has a new colour code, with black nuts for the inputs and red for the outputs. Beautiful and practical.


My bottom row is getting complete.

Nearly finished botom row


And finally, a small sound illustration.  It is made of two main parts. The first is the sine output of the Pony VCO, modified by its timbre and the Twin Drive, filtered by Ripples and animated by Tides and Rampage. This is about the first minute of the sound bite. It is detailed in the patch notes below.
For the second part, a PWM wave is split into high and low frequency parts by a multi-mode filter and animated by Tides and Rampage envelopes. The sum of the two is then passed through Rings, then Beads in stereo mode.


Patch of the first part of the track


Monday, 6 June 2022

Some Drums, Some Bass

Here is a short sample of what you can do with Ornament & Crime (OCP) module. I know, I was not very prolific producing music these past months.

Here goes.


OCP euclidian rhythm params
This five-track piece was recorded on a single session.  No detailed patch today but a light description with the links to the modules I used.

Ornament & Crime with the Pique application generates the three envelopes for the drums using the included euclidian rhythm patterns. 

Kick is Ripples filter pinged and modulated by OCP envelope number 1.

Light clap is a sine wave ringed modulated with white noise in A*B+C with OCP envelope number 2.

Hi-Hat is pink noise mixed with triangle into Erica Synth high-pass filter with OCP envelope number 3.

Patterns for clap and hi-hat are controlled via control voltage, hence the variations.  Clap is controlled via sequencer, hi-hat density is controlled by a random source.  


The synth setup
Swoosh effects is white noise into Rings into Beads, with Tides and other sources as modulation.

Bass, clock and sequencer from Novation Circuit Mono Station.

Sources of modulations : Sloth Chaos, Rampage, Turing Machine and Sample&Hold.

Some effects courtesy of Line 6 HX Stomp.

DAW : Reaper.  Additional effects on Hi-Hat include a dotted 8th note delay. Other effects: stereo diffusion, compressor on drums and bass, some reverb on drums, tons of EQ.


Sunday, 19 December 2021

ModWiggler Odd Meter Remix Challenge

I'm no stranger to participate to some Internet forum challenges or contests.  Some of them are being illustrated in this very blog.  I participated in about ten One Synth Challenge sessions, some other KVR contests and more than my share of Audiofanzine contests.  Lots of these can be found in this Soundcloud playlist.

But this was different.

Some admins from the site ModWiggler decided to have a contest between them to create an odd meter track.  The challenge here was be to ‘remix’, or ‘re-mangle’, or ‘reimagine’ the winning track (whatever that means) and use at least two of the provided multitrack files in some sort of manner. 

The principle gear used must be modular or semi-modular and patchable with pins or cables. 

It was fun and I learned a lot. I had to do things I was not used to. Performing a track and not arranging clips in my DAW being one of them.

Synthesizer in action with both sequencers

Mixing section with the old synth suitcase

I assembled and looped the two files I selected on a computer and kept them in synch with the sequencers as best as I could.  They can be heard untreated at least once.

I really stretched myself here. Literally, as I brought another table to support the mixer and my old synth suitcase.
I went out of 3.5 mm to 6.35 mm adapters.
I used modules that I previously stored because they couldn't fit in my main rack.
I allowed myself to have the kick drum out of modular but I used an analog mono synth anyway : a Novation Circuit Mono Station.


My main concern was sequencing. I do not own a lot of sequencing capacities. I used my Korg SQ-1 as well as the main sequencer and the third auxiliary sequencer on the Mono Station. The later has the possibility to directly output control voltage and gates signal to a modular synthesizer.

Anyway, I'm not used to use only the modular and to mix outside the box. For the sake of the challenge, I refrained from arranging and mixing in my DAW, so the mixing took place inside my good old Berhinger MX802. It's written 'eurorack' on the faceplate, so that counts I guess.  

Only treatments in DAW are a bit of EQ, compressors and a limiter.
To be fair and accurate, I did a little copy-paste to correct a technical issue at the end. The issue is present somewhere else on the track but it was too loud and clear on the ending.

So enjoy :


Full documented patch :


Wednesday, 1 December 2021

Facing the Tides

 Tides was the new module I slipped in the new case.

Tides unboxed

Now that I have more space in my case, I reckon I can accommodate another Mutable Instruments module.
Some might argue that this was the main reason to get the new case in the first place.

Cause or effect ?  Whatever.
 

The Mutable Instruments modules in the rack.  Tides on top.

Mutable Instruments Tides checked a lot of boxes.  

I felt I needed more modulations.
Tides is a LFO and an envelope generator at the same time.  Waveform parameters like shape, smoothness and slope are modifiable via control votage.  So there are a lot of waveforms available.  The module accepts an external clock as well.
It has multiple outputs and, depending on the mode, they are either different shapes, different amplitudes, different times or different frequencies.
Frequency range can go up into audio range, making this my third VCO.

In action


In the following piece, Tides plays the role of LFO, envelope generator and oscillator.  I have displayed the patches to demonstrate how it is done. 


The first part is a four-track drone. Each animated by a dedicated LFO from Tides in « different frequencies » mode.  Lots of effects (from Reason rack) added in the DAW (Reaper) as well.
Then two « bass » tracks played with the Korg SQ-1.  Tides is now the VCO.  Same patch, different settings.  The variations are either the Ripples filter frequency or the shape and smoothness parameters from Tides.  These have a dramatic effect on the sound obviously.
Finally, Tides serve as one of the Attack-Decay envelope from the drum part.

A bit of cut-paste in a sequencer and voilà …

The patches...

The four-part drone waves :

Drone

 The basses :

Bass

The drums : kick, snare, hihat :


Drums

HiHat


Sunday, 11 April 2021

Emilie's Last Stand

So I got Beads.

Not the decorative string of pearls, the Eurorack Module from Mutable Instruments.

To be more specific, Beads is the last design from Emilie Gillet, founder of Mutable Instruments.

Just unboxed


Powered by ARM

Beads is a revisit of Clouds, maybe the most successful Mutable module.

I always thought I'd get one one day.   Alas Emilie discontinued it more than 3 years ago.  Beads development took more time than expected, which created frustration and anticipation among Eurorack aficionados.

Beads, as Clouds, is dubbed a "granular texture synthesizer".
Basically, Beads samples its input continuously and creates tiny bits of sound or grains.
Up to 30 grains can be created and processed.  


From the manual :
One way of picturing how Beads operates is to imagine a tape loop, on which incoming audio is continuously recorded.

Every time you request a grain to be played (in reaction to a trigger, a button press, periodically, or randomly), a new replay head positions itself along the tape.

If this replay head doesn’t move, the audio will be played back at the original pitch and speed, but if it moves closer to, or further away from the record head, the signal will be replayed at a different speed and pitch. This replay head has its own amplitude envelope, and it will leave the tape once the envelope has reached a null amplitude.

Now imagine up to 30 replay heads flying along the tape. Imagine you can stop the incoming audio from being record- ed on the tape so that all these little replay heads can freely move along and gather sounds. And there’s a reverb…

Bob unscrews previous module

The module manipulates the density, size and shape of grains, as well as the time and pitch of the replay.  In certain modes, this is a reverb, or a delay, or both.
Grain density can go up to audio rate, creating new sounds in the process.

I thought it would make a great addition on my most ambient patches.  And with 14HP, it perfectly replaces my home made phaser effect module.


In place


Here is a small example of a drum loop made with the synth going through Beads in the Sunny Tape audio quality.
First you hear the sound unaltered.  Then Beads comes in progressively.   Grain seed is in sync with the drum sequencer.  You first notice the reverb as grain density start from very low. Then the grain density increases.  With small grains and low density, you hear the individual grains.  
I play a little bit with some settings and go up to 100% wet on Beads.
Finally, I select the random mode for grain seeding and I slowly bring back the unaltered sound in the mix.


Here is the full patch :


Friday, 17 July 2020

Three years

Three years ago, when I started this blog, I wanted to share my experience of making a modular synthesizer. First in English only, the blog contained electrical schematics and technical explanations. A few months later, I decided to create a French version to share this journey in the world of modular synthesizers with more people around me. The French version contains less schematics and more sonic illustrations. The articles are pretty much the same, but the two blogs are not 100% identical.


This is the 36th article on this blog. I kept on with my goal to publish one article per month on average. Some months were more prolific than others though.
The blog has now more than 19000 views and 10 comments. 21% of the audience comes from the USA.  The most popular article is the one on the Output module with 1200 views.


Since August 2018, Bob, a little Lego figure, accompanies me on every article about building something.  Initially relegated to cleaning tasks, Bob was able to show some skills in drilling or module tuning.  His small size makes him a valuable partner for delicate work.
 

There were so many evolutions between the first family photo in September 2017 where my first modules are finally assembled in a 3U Eurorack synthesizer row beginning and now with almost two finished rows of 84HP.  The synth includes, from top to bottom from left to right, One ADSR envelope generator, one CV quantizer, two oscillators, two filters, four VCA, one phaser effect, one output module, one sample & hold with noise generator, one slew limiter, two attenuators, a mixer, a voltage reference, a double multiple, one chaotic modulation generator, a signal multiplier with CV offset, a double modulation generator, one random generator and a resonator.


First family photograph, September 2017 :


And nearly 3 years after....

Some of the big steps are detailed here below :

- my first module (August 2017 - built on November 2016) : you have to start somewhere


- the case (February 2018) : modules have a home now
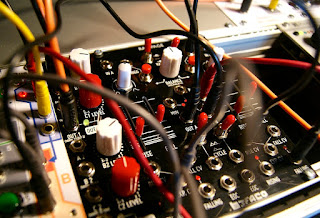


- first kits (May 2018) : I now have nice modulation sources


- repairing my VCO (July 2018) : I finally have a tuned sound source


- Doepfer DIY (September 2018) : comes with my first filter


- Replacing the Doepfer DIY with separated elements (early 2020) : new ADSR, new VCO, new filter.


I learned a lot on this journey into the world of do-it-yourself synthesizers.
First of all, I improved my brazing technique.  I can now make denser builds than before.
I've learned how to design module panels.  I also tested and approved new suppliers, such as Thonk.
But more importantly I learned how to use the synthesizer, how to use it to create generative music, how to create different types of sounds.

I used the synthesizer to make 21 tracks.  Mostly as illustrations of the function of a module for the blog, but not only :
- 11 sound examples of the module at hand;
- 7 sound illustrations of the state of the synthesizer;
- 2 participations to the monthly KVR Music Cafe;
- 1 participation to Audiofanzine Inspired Composition (Compos Inspirées).


And here is the track of the day :


All sound from the modular synthesizer.  Too many tracks to detail them all. 
Most tracks were performed in a very traditional way for me : first writing and recording a MIDI track, then programming the synth sound and recording the audio using the Korg SQ-1 sequencer as a MIDI to CV converter.  Exceptions : drums were made using the SQ-1 as the sequencer and percussion were generated by the Turing Machine.
DAW : Reaper